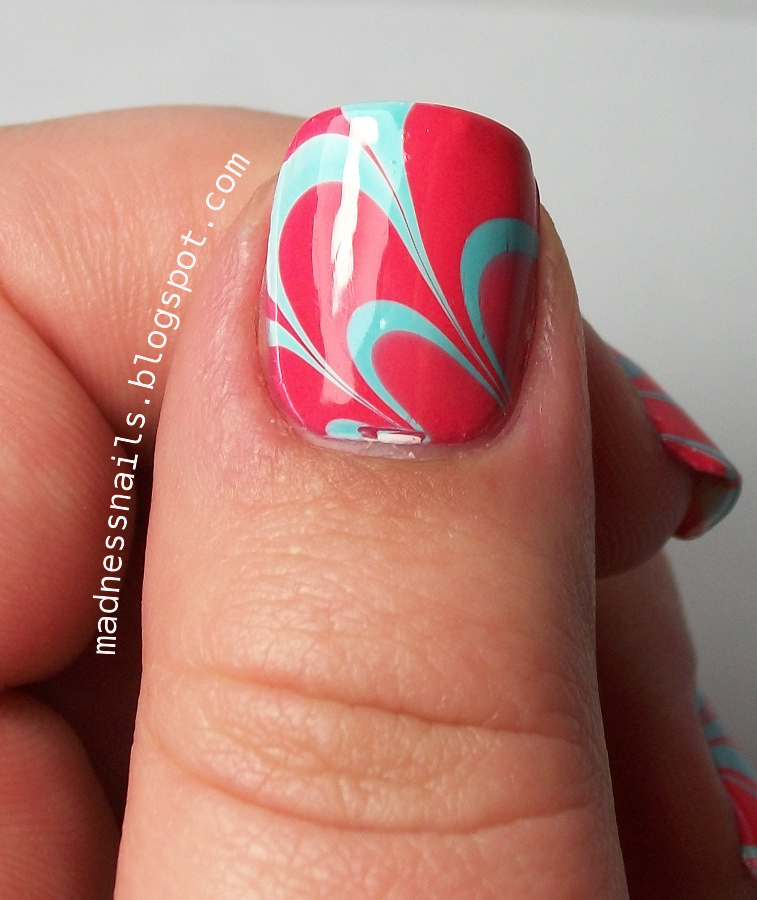
Showing posts with label water marble. Show all posts

Thursday, July 31, 2014

Nail Candi Review: Manicure Jewellery

Hi there lovelies! Do you know how daunting a feeling it is when you check the calendar and realize it is 31 July already? Where the hell did the year go?! I’ll be honest though, I’m not complaining too much...it only means winter is going to see her butt one of these days and that is A-okay in my book! Be gone, you crazy drying static-fueled cow! BE GONE!


Source
 
A little while ago I received the cutest little package from Nail Candi, a company who is fairly new to me (because I sleep under a rock apparently) with some gorgeous nail art pieces inside. The first thing that grabbed my attention was these little letter T jewels and I just knew I wanted to play with them ASAP! So here is what I came up with.


I started by laying down a base of Sinful Colors Snow Me White. When this was dry, I made a water marble pattern using Tip Top Nail Chic Hap-Pea and Tip Top Nail Chic Pot-O-Berries. I then added a layer of topcoat and waited for it to dry properly. To add the nail jewel, I laid down a little nail glue to the back of the jewel and quickly placed it down on my middle finger.


I really love the look of this little jewel. It gives that extra bit of pop to any mani, whether it’s a plain one or an artsy one. It also didn’t feel too awkward and after a while I kinda forgot it was there...unless I worked with my hair. The arms of the “T” isn’t curved so they tended to catch in my hair but mostly because I have curly hair and wear a crap load of mousse! However, that is the only down side to it. It stayed on my nail securely for 2 days and it probably would’ve lasted longer if I didn’t take it off myself!

The letter jewels are a special edition and is not shown on Nail Candi's website but can be ordered from Nail Candi directly via email. You can also follow them via the following social media sites for news on special editions, sales and all other things filled with pure awesomeness: 


Please go have a look at their site. They have the most amazing nail jewellery available ranging from manicure jewels to midi rings. Also...I’m adding the Pegasus and skulls manicure jewels to my Must Have List. They’re freaking awesome! *nudge nudge wink wink*

Lots of mad love...


Thursday, March 6, 2014

Minty Marble

Hi there lovelies! We’re halfway through this lovely, wet, rainy week and man, am I looking forward to the weekend. Don’t get me wrong, I love my job but I need sleep so bad! I’m yawning as I’m typing this post out! It’s ridiculous! And it’s been miserable and rainy here since last week Friday. Weather like this should not be spent in an office, people! I need to be in bed with a book!

But anyhoo, mid-week medium rant (or moan fest) over. Let’s get on to "Le good stuff" shall we? 

As you guys know, I have an unashamedly big love for water marbling. I am constantly looking for ways to bring it into my mani’s and what better way is there than with a skittlelette mani?


I started by laying down a base of Sinful Colors Snow Me White on my middle finger and water marbled using Sinful Colors Island Coral and China Glaze Re-fresh Mint. On my ring finger I layed down 2 coats of Sinful Colors Island Coral and simply took 2 gold heart shaped studs and colored them using China Glaze Re-fresh Mint. To finish off the look, I added 2 coats of L.A. Girl Green Sand on my thumb, index finger and pinky.


I really loved how this came out! It’s the type of mani I could easily wear for 2 days AND I got to scratch my water marbling itch, even if it was only slighty. Hmmm...now to ponder on my next water marble mani without making you guys sick of them!

If you would like me to swatch any of the colors you saw in today’s post, please let me know via email or drop me a comment below. More than willing to oblige! 

Lots of mad love...  


Saturday, February 15, 2014

Valentines Day Nail Art: Part 2

Hi lovelies! I'm here again with the second round and my official Valentines Day mani. I'm posting this one quite a bit late because that way, I kind of have the best of both worlds time wise. Like I'm not just celebrating Valentines Day with my lovely local people but also people in other countries that are quite a few hours behind us. That way, I am literally stretching my time!

Let's get into the mani, shall we?


I started out by laying down 2 coats of Sinful Colors Snow Me White. When this was dry, I created a water marble pattern using Tip Top Nail Chic Sherbet Angel and Nubar Competition Red. Lastly, I wanted to add a little bit something extra to the mani and stamped over the water marble using Bundle Monster plate BM-411 and Sinful Colors Snow Me White.


So this is a really short and hopefully sweet post but I don't think you want to be spending your Valentines Day reading a silly post, do you? Nah! I hope everybody gets spoiled rotten and has an absolutely beautiful Valentines Day.

If you would like me to swatch any of the colors you saw in today’s post, please let me know via email or drop me a comment below. More than willing to oblige! 

Lots of mad love...  


Wednesday, January 8, 2014

First Post for 2014...featuring Christmas 2013.

Hi lovelies! How are you guys?? I have genuinely missed everybody but for the past few weeks it has been absolute holiday chaos here at home so the blog just never got time! It sucks though because I had so many ideas and things that I wanted to post but now they're all going to have to wait for the end of this year. It's okay though. I am psyched for 2014! I have some things I want to start doing more regularly on the blog this year. There is also definitely going to be more swatching taking place because I am busy with a swatching project at the moment but we'll get more into that once I start posting my swatches.

For today's post I decided to post my mani's I did over the Christmas season. Yes, they are all festive and I am sure most of you guys are actually enjoying the break from all the Christmas mani's that we get flooded with over Decembers but just think of them as that “Marked Down” table in the entrance of Supermarkets. Sure, all the mince pie boxes look old and unwanted and the Lindt Chocolate Santa's head has been squished in from all the handling he has been through but damn it, I am going to enjoy my 50% marked down Woolworths shortbread! Even if the outside looks wonky, the inside means well and they still taste damn good!

So, now that I have finished guilting you guys into enjoying some more Christmas goodies, let's get on with it shall we!

My mom made these adorable little cards for our gifts and I thought it might make a nice idea for a mani!


For this mani I used Nubar Greener, Nubar Reclaim, Zoya Chyna, China Glaze Starboard, China Glaze Spontaneous, OPI A Oui Bit Of Red, Tip Top Nail Chic Solar Flare and Tip Top Nail Chic Grape To Meet You.


My next mani was inspired by THIS awesome post I saw in 2012 on Manicurator. After realising I SUCK at making Christmas trees on my nails though, I decided to change it up a little bit. For this mani I used Sinful Colors Snow Me White, Nubar Competition Red, Nubar Greener and Nicole by OPI Rainbow In The S-Kylie.


Last but not least, I saw this awesome idea to stamp over watermarbling on Facebook somewhere. For the life of me though, I can not find the original creator of the idea anywhere so if anybody can help me, that would be great! For this mani I used Bundle Monster plate BM-323, Essence White Stampy Polish, Sinful Colors Snow Me White, China Glaze Grape Pop, Nubar Competition Red and Opi Jade Is The New Black.


In general, I loved all these mani's. I was the proudest of the watermarble mani though. Even though the stamping isn't perfect, I think it is a great idea and and I am definitely going to try it again!

If you would like me to swatch any of the colors you saw in today’s post, please let me know via email or drop me a comment below. More than willing to oblige! 

Lots of mad love...


Friday, November 8, 2013

Water Marbling Equals HAPPY TIMES!

Hi there lovelies! It's Friday so everybody must be pretty excited! I know I am because my better half only works half day on a Saterday so I get to spend some extra time with him. Score ME! (Somebody just got some brownie points! *points thumbs at self*)

On a bit more serious note, this weekend is registration weekend for the upcoming South African Presidential Elections in 2014. Basically, if your aren’t registered or you moved towns after the last elections, you can go and register this weekend to be able to vote next year. I know a lot of people have a bit of a “Meh” attitude towards the South African Elections but it is literately the least a person can do to make a change in this country! So go for it! Register and be able to say, I did my part even if it's very small! For more info on where you can register in your area, you can check this LINK.

Now on to some less serious business but damn important if you live in my world! Nails!

I might be ever so slightly obsessed with water marbling again since the #MTVnailChallenge prompted us to do water marble in our last topic. So I played around with some more polish and came up with this skittlette mani.


On my thumb, middle and ring finger I layed down 2 coats of Sinful Colours Snow Me White. A white base really helps the colors that you use in your water marble to stand out. I used China Glaze Flyin' High and China Glaze Spontaneous to make the water marble.


On my pinky and index finger I simply layed down 2 coats of China Glaze Flyin' High and with my large ended dotting tool I just made two dots on the middle of those fingers with China Glaze Spontaneous.


I really liked how this came out! Teals and purples are some of my favorite colors so combining them just took me to my happy place!

I hope you guys have a spectacular funtastical weekend and whatever you do, keep it safe!


If you would like me to swatch any of the colours you saw in today’s post, please let me know via email or drop me a comment below. More than willing to oblige! 

Lots of mad love...


Tuesday, October 29, 2013

Jack-O-Lantern Water Marble

Hi lovelies. Happy Tuesday! It feels so fresh and clean here in Pretoria because we had some lovely rain last night. Going to enjoy it while it lasts and before my skin goes “Hey! Lookie! Dust! And hey! Lookie again! A hive! Or five!”. Fun times people! Fun times!

Little bit of side news. I did a guest post and a Q&A for the lovely Heather from Femme Lifestyle a few weeks ago. My first ever tutorial people! Scary stuff! But maybe worth a look? Feel free to go check it out:

Today's mani was inspired by the current festivities in the air and the fact that every time I try a water marble mani, I have to try it again. I love the technique! It's a pain in the butt to do but the results are worth it!

Nail Polishes used:
  • Tip Top Nail Chic Solar Flare
  • WOW Nail Polish #393

Tools Used:
  • Thin nail art brush


For my base I layed down 1 coat of Tip Top Nail Chic Solar Flare. I used WOW Nail Polish #393 and  Tip Top Nail Chic Solar Flare to make the water marble on all my nails except for my middle finger. On that I added another coat of  Tip Top Nail Chic Solar Flare and with the thin nail art brush and WOW Nail Polish #393 made my Jack-O-Lantern face.


In general, I really like how this came out...except for the stained cuticles. Orange and acetone are not friends people! They will team up and turn against you. Luckily it didn't bother me too much and I always enjoy playing around with the marbling! Worth the stains! 

If you would like me to swatch any of the colours you saw in today’s post, please let me know via email or drop me a comment below. More than willing to oblige!

Lots of mad love...


Friday, October 25, 2013

#MTV Challenge: 10. Gradient & Watermarble

Lovelies! What is that ridiculously silly smile I see there on your face? It's because it's Friday, isn't it! You have my full permission to spazz out when you're done at work!
So there is a huge possibility that some sort of phenomena is going to take place today because I am finally done with the MTV Challenge! Nope, I kid you not! If you see a unicorn today or my relationship status on Facebook says “Married to David Tennant”, you know why!...Oh please, oh please say it's the David Tennant one! Hmmmmmm...


Anyhoo...


10. Gradient & Watermarble


Nail Polishes used:
  • WOW Nail Polish #393
  • Sinful Colors Snow Me White
  • Wet n Wild Buffy The Violet Slayer
  • Nubar Palau Coral
  • Essence Top Coat

Tools/Other Used:

  • Dotting Tools
  • Make-up sponge
  • Thin small nail art brush


I started out by laying 2 coats of Sinful Colors Snow Me White on all my nails. With a make up sponge, I then made a gradient on my pinky and index finger using Nubar Palau Coral and Wet n Wild Buffy Violet Slayer. When this was dry, I made a watermarble using Essence Top Coat and WOW Nail Polish #393.


On my ring and middle finger I used the thin nail art brush and dotting tool to make sugar-esque skulls. Finally on my thumb, I used a large dotting tool to create a few random flowers and just added a few smaller dots in between to full up the space a bit more.


Overall, I really like this mani! The execution could have been a little bit neater but I only realized the major flaws when I was cropping the photos. The colours I love together though! I'm wearing Nubar Palau Coral on my toes at the moment and man, I dig it! Another one to go on to my “To Swatch” list...with Wet n Wild Buffy The Violet Slayer because she is a stunner!
I just want to say a huge THANK YOU to my awesome friends For The Love Of Nail Art and Ordinary Misfit! Loved doing this challenge with you ladies and can't wait to do the next one with you! You ladies absolutely killed it! Also thank you to Polished Tickles & Beauty, Mama Zombie Mumbles and Passion For Polish for joining us along the way. You all did amazing work! So same time, same place next year? ;D


If you would like me to swatch any of the colours you saw in today’s post, please let me know via email or drop me a comment below. More than willing to oblige!


Lots of mad love...


Monday, August 26, 2013

Facing off with an old enemy and sparking up a new love...

You look at her with wishing, lusting eyes, hoping you can one day own her. Her touch is cold, wet, unforgiving...yet you can't help but to give your hand to her. She will leave you covered  in anger and misery and emotional pain but she doesn't even give a damn because she knows...you'll just be back for more! A breaker of the stoic, a killer of the heart...a cruel cruel mistress...

Yes people, I am talking about water marbling! She was cruel to me! She hurt me! I didn't want to try her ever again and I kept it that way for more than a year! I will never have to try and do her. Or so I thought...and yes, I am referring to her as a living entity. Nothing that mean and painful could not have a life!

Anyhoo...

See ,when I first got into nail art, water marbling was one of the first techniques I saw after browsing many, MANY nail art blogs. And I loved it! It looked brilliant! And the 2 weeks before that of making dots, drawing lines, achieving a semi-succesfull dry marble/needle drag left me feeling like a boss! I could do anything! ANYTHING! So off I went, getting my tap water ready, putting it in a shallow bowl, grabbing some random polishes and I was ready! Pffft, this was going to be a breeze! So I sat down and I started. I open my first bottle of polish and wait for the drop to fall off the brush. Nothing. I wait some more...nothing! Shake, shake, SHAKE, Dammit my brush touched the water! Next bottle. Open it, wait, wait, shake shake shakeshakeshake and it drips! Yes! But from a too high distance...down to the bottom she goes...meh, polish must be too heavy! * Breath Thea* Next bottle. Open it, it drips nicely, doesn't spread too well but hey, RESULTS! Oooh, need to add my next drop! 1st bottle was too thick, 2nd bottle's polish “too heavy”, can't add the same color from the 3rd bottle so grab the next closest  option...It's not open yet. And it's stuck! Really really stuck! “BAAAABE!”. After my fiance opens it for me, I add a thick drop (after shaking my arm off again) and it just sits there. No spreading and no “Oooh, science” reaction invoking goodness! It just sits! Like a fat pimple before a school dance! *BREATH THEA* Okay! Let's scoop this crap up and start again. 1st drop, spreaaaaad, 2nd drop, spreaaaaad! *happy squeal* Add few more drops, take a toothpick and makes random squiggles in between, happily dip my finger in aaand problem. My bowl is too shallow...”Okay, this is a weird angle but I can work with it”...clean up the polish from the surface but there's a few random polish chunks still drifting around on the water. Whatever! I nailed this! Take out my finger and ...my nail picked up one of those floating things up! “AAAAAARGH! FRAKKING MOTHER SON OFFA AAAAGH!” “Baby, calm down...” “I AM FRAKKING CALM!” *storms off saying a few more loud choice words*

Okay, so maybe it wasn't that bad and I am a bit of a drama-queen but afterwards I just felt like I could not do water marble. At all! And frankly, I didn't want too. It sucked and was over-rated!

That being said, I am currently taking part in the Tip Top Nail Art Concept. Tip Top gives us a nail art technique to try for the week and they post it up on their page the next Monday. It's not a competition and purely for fun! Until I saw the new concept for the past week. Water marble. Yeah, I may have sworn out loud when I saw this. I did not want to do it! Nope! Not at all...but in the spirit of taking part I decided to try it again...

Nail Polishes used:


  • Tip Top French Manicure White
  • Tip Top Nail Chic Cha Cha Cha
  • Tip Top Nail Chic Ripped Me Red

Tools used:
  • Dotting tool

Other:
  • Polystyrene cup
  • Tooth pick
  • Filtered water, room temperature


I'm not going to go into the process like I usually do to explain exactly how I did this because I think everybody has probably seen water marble techniques everywhere. I am going to go into my experience with it though.


As you have obviously figured, I wasn't looking forward to this technique but I went in with an open mind. And I've been meddling with nail polish for more than a year now so it's a little smarter mind (Heavy polish! *facepalm*)! I spent one evening just playing with my Tip Top polishes, checking which ones spread the best, which ones are the most opaque, drying time etc. I also used filter water instead of tap water and let it sit outside for about an hour to become room temperature. And I used a polystyrene cup. It's not too wide and it's the perfect depth for me! Oh, and I watched a crap load of YouTube videos!


This experimentation really paid off because it actually worked! IT ACTUALLY WORKED! *angels sing* I only had to redo 2 of my nails because I accidentally messed acetone into my water, which caused the polish to spread too much. But honestly, I enjoyed it! So much that I think I might be a little obsessed! I love this technique now!


I am very proud of my results! And I'm happy! Giving something a try that I hated reunited me with an old love and I couldn't be happier!


I hope everybody has a great week and if you read all the way to the end, kudos and thank you!

If you would like me to swatch any of the colours you saw in today’s post, please let me know via email or drop me a comment below. More than willing to oblige!

Lots of mad love...