Good morning lovelies! So, we are going into the 8th day of the
#31DC2014 and I must admit, I’m having more fun than I thought I would.
It is quite tiring at times but the pay-off is really worth it. Also,
seeing some of the other ladies work is really inspiring. You freaking
go girls!
Day 8: Metallic Nails
I wasn’t too excited about this prompt. Not only was I very low on
inspiration but I don’t think I own any true metallic nail polish. So I
went with what was metallic to me and played around a bit. While I was
playing around with my polishes though, I saw that some of my metallics
did what a lot of metallics do...streaki-ness galore! And hence, I realized I could use this to my advantage. So this is how my metallic
marble was born.
I layed down a very thick coat of Nubar Erratic Purple on a plastic
baggie. I then went in with a small dotting tool and just swirled the
polish around in a random motion until I was happy with the “pattern”
that it created and left it for about 2 hours to dry properly. When it
was dry, I added another thick coat of clear polish over the marble just
to give it more of a foundation for when I remove it. When everything
had dried properly, I lifted the polish off the baggie with a tweezer
and cut it into different sections similar to the size of my nails. Then
I layed a very thin layer of clear nail polish over each of my nails
and let it sit for about 20 seconds to get tacky and placed my little
marble decals over the tacky base. I then just flattened everything down
nicely to make sure there were no air bubbles underneath, cleaned up
around my nails and layed down another thin coat of fast drying topcoat,
making sure I wrap my tips.
This mani came out pretty cool in my opinion! It kind of looks like
liquid molten metal, doesn’t it?...Which then just made me wish that I
rather used a silver metallic polish because then it would look like
liquid Adamantium! AAAAAAAGH! An unintentional X-men mani! Why didn’t
you Thea?? Whyyyyyyyyyy??
Lots of mad love...
Showing posts with label dry marble. Show all posts
Monday, September 8, 2014
Wednesday, July 10, 2013
First NAIL ART post! Featuring screams from the past and marbles!
Well hello there you beautiful bunch! 2
posts in one day?? Aren't you lucky!
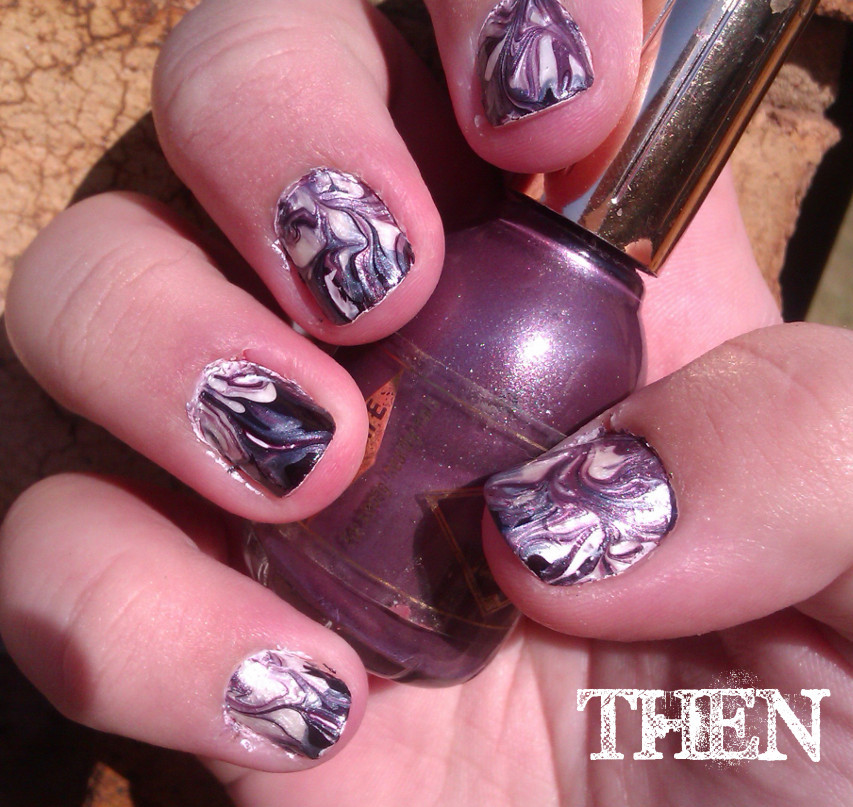
For my first official nail art post I
decided to take a bit of a trip down memory lane by doing a “Then
and Now” type of post with the very first proper nail art I ever
tried. And by proper I mean PROPER! I've dabbled in stickers and
rhinestones in my high school years but this was my first full on
“balls to the wall” type of nail art. And I was quite proud of
myself back then.
When I discovered nail art about a year
ago, one of the first techniques I saw was dry marbling/needle
marbling and I loved the look! It wasn't too hard to do and was way
less messy than water marbling. So using this tutorial from
Nail Nerd I jumped right at it and gave it beans!
Like I said, I was quite proud of the
results back then but looking back at the photos now I can see a big
improvement. On to the “Now”...
Not only is my clean up job better but
the general state of my hands just looks healthier! It shows that a
bit of moisturizing and good cuticle care actually pays off! Also, I
have definitely improved on my ability to file my nails in a
semi-decent shape! Not there 100% but I'm getting there.
Nail Polishes used:
- Sinful Colors Snow me white
- Tip Top Nail Chic Purple Reign
- China Glaze Spontaneous
Tools Used:
- Small tipped dotting tool
- Plastic freezer bag
- Tweezers
Unfortunately I have no idea what the
exact polishes was that I used a year ago.
I started by laying down the 3 colours
next to each other quite thick on a plastic freezer bag. Then with a
small ended dotting tool I went in and made random swirls. The
bigger the dotting tool end, the thicker your swirls will be. Once
this was properly dry (I usually wait a day) I lifted it off the
baggie with the tweezers and cut it down into smaller individual
pieces so it was easier to place on the nails. On my nails I put on
a base of Sinful Colors Snow me white. When this was dry I
laid down a thin coat of topcoat, waited till it felt almost tacky
and then laid down the marbled pieces on my nails as shown in this
tutorial. I finished off the mani with Seche Vite, cleaned
up my edges with a pointed q-tip, a small paint brush and some
acetone and BOBS YOUR UNCLE!
Moral
of the story: If you're a blogger and are feeling down in
the dumps, look back at your work from a year or more ago and then
look back at your current work. I guarantee you there will be a huge
improvement and you will feel AMAZEBALLS!
I hope you enjoyed my first official
nail art post with me and that you will stick around for the many
more to come in the future!
Lots of mad love!
Subscribe to:
Posts (Atom)


.jpg)
.jpg)
.jpg)