You look at her with wishing, lusting eyes, hoping you can one day own her. Her touch is cold, wet, unforgiving...yet you can't help but to give your hand to her. She will leave you covered in anger and misery and emotional pain but she doesn't even give a damn because she knows...you'll just be back for more! A breaker of the stoic, a killer of the heart...a cruel cruel mistress...
Yes people, I am talking about water marbling! She was cruel to me! She hurt me! I didn't want to try her ever again and I kept it that way for more than a year! I will never have to try and do her. Or so I thought...and yes, I am referring to her as a living entity. Nothing that mean and painful could not have a life!
Anyhoo...
See ,when I first got into nail art, water marbling was one of the first techniques I saw after browsing many, MANY nail art blogs. And I loved it! It looked brilliant! And the 2 weeks before that of making dots, drawing lines, achieving a semi-succesfull dry marble/needle drag left me feeling like a boss! I could do anything! ANYTHING! So off I went, getting my tap water ready, putting it in a shallow bowl, grabbing some random polishes and I was ready! Pffft, this was going to be a breeze! So I sat down and I started. I open my first bottle of polish and wait for the drop to fall off the brush. Nothing. I wait some more...nothing! Shake, shake, SHAKE, Dammit my brush touched the water! Next bottle. Open it, wait, wait, shake shake shakeshakeshake and it drips! Yes! But from a too high distance...down to the bottom she goes...meh, polish must be too heavy! * Breath Thea* Next bottle. Open it, it drips nicely, doesn't spread too well but hey, RESULTS! Oooh, need to add my next drop! 1st bottle was too thick, 2nd bottle's polish “too heavy”, can't add the same color from the 3rd bottle so grab the next closest option...It's not open yet. And it's stuck! Really really stuck! “BAAAABE!”. After my fiance opens it for me, I add a thick drop (after shaking my arm off again) and it just sits there. No spreading and no “Oooh, science” reaction invoking goodness! It just sits! Like a fat pimple before a school dance! *BREATH THEA* Okay! Let's scoop this crap up and start again. 1st drop, spreaaaaad, 2nd drop, spreaaaaad! *happy squeal* Add few more drops, take a toothpick and makes random squiggles in between, happily dip my finger in aaand problem. My bowl is too shallow...”Okay, this is a weird angle but I can work with it”...clean up the polish from the surface but there's a few random polish chunks still drifting around on the water. Whatever! I nailed this! Take out my finger and ...my nail picked up one of those floating things up! “AAAAAARGH! FRAKKING MOTHER SON OFFA AAAAGH!” “Baby, calm down...” “I AM FRAKKING CALM!” *storms off saying a few more loud choice words*
Okay, so maybe it wasn't that bad and I am a bit of a drama-queen but afterwards I just felt like I could not do water marble. At all! And frankly, I didn't want too. It sucked and was over-rated!
That being said, I am currently taking part in the Tip Top Nail Art Concept. Tip Top gives us a nail art technique to try for the week and they post it up on their page the next Monday. It's not a competition and purely for fun! Until I saw the new concept for the past week. Water marble. Yeah, I may have sworn out loud when I saw this. I did not want to do it! Nope! Not at all...but in the spirit of taking part I decided to try it again...
Nail Polishes used:
- Tip Top French Manicure White
- Tip Top Nail Chic Cha Cha Cha
- Tip Top Nail Chic Ripped Me Red
Tools used:
Other:
- Polystyrene cup
- Tooth pick
- Filtered water, room temperature
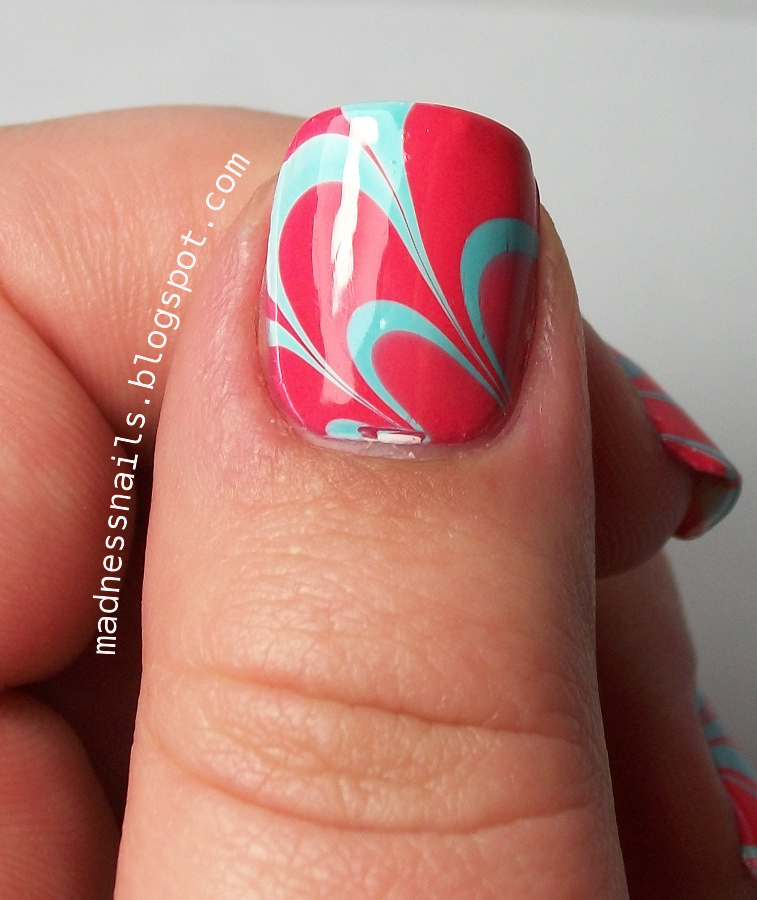
I'm not going to go into the process like I usually do to explain exactly how I did this because I think everybody has probably seen water marble techniques everywhere. I am going to go into my experience with it though.
As you have obviously figured, I wasn't looking forward to this technique but I went in with an open mind. And I've been meddling with nail polish for more than a year now so it's a little smarter mind (Heavy polish! *facepalm*)! I spent one evening just playing with my Tip Top polishes, checking which ones spread the best, which ones are the most opaque, drying time etc. I also used filter water instead of tap water and let it sit outside for about an hour to become room temperature. And I used a polystyrene cup. It's not too wide and it's the perfect depth for me! Oh, and I watched a crap load of YouTube videos!
This experimentation really paid off because it actually worked! IT ACTUALLY WORKED! *angels sing* I only had to redo 2 of my nails because I accidentally messed acetone into my water, which caused the polish to spread too much. But honestly, I enjoyed it! So much that I think I might be a little obsessed! I love this technique now!
I am very proud of my results! And I'm happy! Giving something a try that I hated reunited me with an old love and I couldn't be happier!
I hope everybody has a great week and if you read all the way to the end, kudos and thank you!
If you would like me to swatch any of the colours you saw in today’s post, please let me know via email or drop me a comment below. More than willing to oblige!
Lots of mad love...